Get our toolbar!

Peoples in now

"Hai My Friends .Your Comments are My Blog Life
Impression So Please Give Your All Comments"

Top Songs Of 2012

The song has received positive reviews from critics who complimented the song’s effective lyrics and chorus, and commended Ludacris’ part and the song’s ability to have an urban twist.

Most Visited Websites 2011-2012

Google Search or Google Web Search is a web search engine owned by Google Inc. Google Search is the most-used search engine on the World Wide Web, receiving several hundred million queries each day through its various services.

History of Facebook

Mark Zuckerberg wrote Facemash, the predecessor to Facebook, on October 28, 2003, while attending Harvard as a sophomore. According to The Harvard Crimson, the site was comparable to Hot or Not, and "used photos compiled from the online facebooks of nine houses.

Airtel 3G 70% less in Kerala Plans

First time users please follow the steps as given below to go 3G in Kerala:- » Select network settings to "automatic" on your handset » Choose "3G only mode" and wait for network registration. » After registration and seeing 3G network on your handset, Select "Dual Mode" or "3G and 2G mode" to enjoy 3G .

Aakash Tablet is Available For Booking

You can Order your Aakash Tablet now. The long wait for Aakash Tablet is now over. Now you can book your Aakash Tablet online which will be delivered within a week from the day of booking. Aakash was the most awaited Indian Tablet, which took many people’s attention all over the world.

Showing posts with label Blog Tricks. Show all posts

Adsense Below the post title in Blogger

Adsense Below the post title in Blogger

Your blog earnings depend mainly on your blog's traffic and on your ad placement. One important place to place the ads is below the Post title. It will give more importance to the ads and there is more possibility to get clicks. This is in accordance with the Google Adsense TOS 

I am personally using the same hack on this blog. You can see adsense ads below the post title on all my  pages.Ok now let us get into the details of how to set it up. 

First of all login to your adsense account and generate ad code of optimum size.. 
Now copy that adsense code into the following box and parse it(you may not see the parser if you are reading my feed) 

Copy off the parsed code.. 
Now login to your blogger account. 
Go to Layout > Edit Html and expand the widget templates. 
Find this piece of code 
<data:post.body/>

Now add the following code just above that line. 
<!-- BloggerPlugins.ORG Adsense Above Posts start --> 
<b:if cond='data:post.isFirstPost'> 
Put your parsed adsense code here 
<br/> 
</b:if> 
<!-- BloggerPlugins.ORG Adsense Above Posts End -->


From now on you should have adsense below the post title. On pages with multiple posts(eg: home page, label page etc) , the adsense ads will show up only on the first post(i.e  below the post title of the first post). It wont show up on the other posts on the same page.So you are abiding by the Adsense TOS.


Label Cloud Widget For Blogger / Blogspot

Label Cloud Widget For Blogger / Blogspot

A tag cloud or label cloud for blogger is a visual depiction of all labels used on your blog.You can see a demo of the Label cloud for blogger(blogger label cloud) here on my site. This Tag Cloud Widget was originally developed by phydeaux3. This is a modded version of phydeaux’s Cloud. This is much better than the Blogger’s Default Label Cloud. First of all Go to Your blogger Layout > Page Elements page and add a Labels Widget there..You can Do that using the Add a Page Element Option on that page.image After Adding the Label Widget Go to Layout > Edit Html (Do not expand the widget templates for the sake of easy explanation) You will find some code similar to

<b:widget id='Label1' locked='false' title='Labels' type='Label'/>
Now Replace that with
<b:widget id='Label1' locked='false' title='Labels' type='Label'>
<b:includable id='main'>
<b:if cond='data:title'>
<h2><data:title/></h2>
</b:if>
<div expr:class='&quot;widget-content &quot; + data:display + &quot;-label-widget-content&quot;'>
<b:if cond='data:display == &quot;list&quot;'>
<ul>
<b:loop values='data:labels' var='label'>
<li>
<b:if cond='data:blog.url == data:label.url'>
<span expr:dir='data:blog.languageDirection'><data:label.name/></span>
<b:else/>
<a expr:dir='data:blog.languageDirection' expr:href='data:label.url'><data:label.name/></a>
</b:if>
<b:if cond='data:showFreqNumbers'>
<span dir='ltr'>(<data:label.count/>)</span>
</b:if>
</li>
</b:loop>
</ul>
<b:else/>
<div id='labelCloud'/>
<p align='center'>
<script type='text/javascript'>
var cloudMin = 1;
var maxFontSize = 30;
var maxColor = [35,130,196];
var minFontSize = 13;
var minColor = [35,130,195];
<b:if cond='data:showFreqNumbers'>
var lcShowCount = true;
<b:else/>
var lcShowCount = false;
</b:if>

// Don’t change anything past this point -----------------
// Cloud function s() ripped from del.icio.us
function s(a,b,i,x){
if(a&gt;b){
var m=(a-b)/Math.log(x),v=a-Math.floor(Math.log(i)*m)
}
else{
var m=(b-a)/Math.log(x),v=Math.floor(Math.log(i)*m+a)
}
return v
}
var c=[];
var labelCount = new Array();
var ts = new Object;
<b:loop values='data:labels' var='label'>
var theName = &quot;<data:label.name/>&quot;;
ts[theName] = <data:label.count/>;
</b:loop>
for (t in ts){
if (!labelCount[ts[t]]){
labelCount[ts[t]] = new Array(ts[t])
}
}
var ta=cloudMin-1;
tz = labelCount.length - cloudMin;
lc2 = document.getElementById(&#39;labelCloud&#39;);
ul = document.createElement(&#39;ul&#39;);
ul.className = &#39;label-cloud&#39;;
for(var t in ts){
if(ts[t] &lt; cloudMin){
continue;
}
for (var i=0;3 &gt; i;i++) {
c[i]=s(minColor[i],maxColor[i],ts[t]-ta,tz)
}
var fs = s(minFontSize,maxFontSize,ts[t]-ta,tz);
li = document.createElement(&#39;li&#39;);
li.style.fontSize = fs+&#39;px&#39;;
a = document.createElement(&#39;a&#39;);
a.title = ts[t]+&#39; Posts in &#39;+t;
a.style.color = &#39;rgb(&#39;+c[0]+&#39;,&#39;+c[1]+&#39;,&#39;+c[2]+&#39;)&#39;;
a.href = &#39;/search/label/&#39;+encodeURIComponent(t);
if (lcShowCount){
span = document.createElement(&#39;span&#39;);
span.innerHTML = &#39;(&#39;+ts[t]+&#39;) &#39;;
span.className = &#39;label-count&#39;;
span.style.color = &#39;rgb(&#39;+c[0]+&#39;,&#39;+c[1]+&#39;,&#39;+c[2]+&#39;)&#39;;
a.appendChild(document.createTextNode(t));
li.appendChild(a);
li.appendChild(span);
}
else {
a.appendChild(document.createTextNode(t));
li.appendChild(a);
}
ul.appendChild(li);
abnk = document.createTextNode(&#39; &#39;);
ul.appendChild(abnk);
}
lc2.appendChild(ul);
</script>
</p>
<noscript>
<b:loop values='data:labels' var='label'>
<span expr:class='&quot;label-size label-size-&quot; + data:label.cssSize'>
<b:if cond='data:blog.url == data:label.url'>
<span expr:dir='data:blog.languageDirection'><data:label.name/></span>
<b:else/>
<a expr:dir='data:blog.languageDirection' expr:href='data:label.url'><data:label.name/></a>
</b:if>
<b:if cond='data:showFreqNumbers'>
<span class='label-count' dir='ltr'>(<data:label.count/>)</span>
</b:if>
</span>
</b:loop>
<br/>Powered By:<small><a href='http://www.bloggerplugins.org'>Blogger Gadgets</a></small>
<br/><small><a href='http://www.bloggerplugins.org/2008/06/label-cloud-widget-for-blogger-blogspot.html'>Label Cloud for Blogger</a></small>
</noscript>
</b:if>
<b:include name='quickedit'/>
</div>
</b:includable>
</b:widget>
Now find
]]></b:skin>
and replace it with
#labelCloud {text-align:center;font-family:arial,sans-serif;}
#labelCloud .label-cloud li{display:inline;background-image:none !important;padding:0 5px;margin:0;vertical-align:baseline !important;border:0 !important;}
#labelCloud ul{list-style-type:none;margin:0 auto;padding:0;}
#labelCloud a img{border:0;display:inline;margin:0 0 0 3px;padding:0}
#labelCloud a{text-decoration:none}
#labelCloud a:hover{text-decoration:underline}
#labelCloud li a{}
#labelCloud .label-cloud {}
#labelCloud .label-count {padding-left:0.2em;font-size:9px;color:#000}
#labelCloud .label-cloud li:before{content:&quot;&quot; !important}
]]></b:skin>
Save your template and now you should get a working Label Cloud On your Blog.
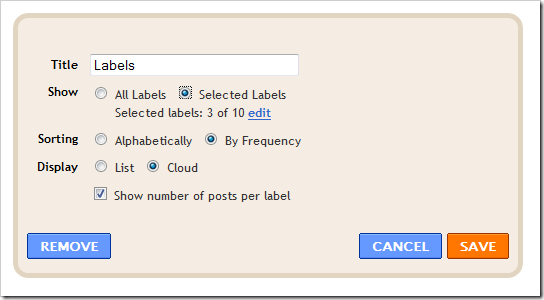
You can Configure the Gadget from the Gadget Options image

Additional Tweaks

These tweaks are optional. Proceed further only if you want to customize the cloud to a better level... Changing Cloud Colours: you can change those colours editing the code a little bit.. you will have to expand your widget templates and modify these 2 lines of code var maxColor = and var minColor = you have to specify the RGB values there separated by commas..If you are sure of what should be the hex codes of the maximum and minimum colors,then you can use this convertor to convert the hex value to RGB values..If you are not sure of what the hex code of the colors are then have a look at this. Changing the Font Sizes: You can change the font sizes by editing these 2 lines of code var minFontSize = and var maxFontSize =


Social bookmarking elements after each blog post(includes Stumbleupon,Twitter,Facebook)

Social bookmarking elements after each blog post(includes Stumbleupon,Twitter,Facebook)

Update:-Facebook Icon Added 
Social Bookmarking Icons for Blogger - The social bookmarking blogger widget will add neat social bookmarking icons below each of your posts so that your readers can bookmark your posts at various social bookmarking sites like digg,stumble,magnolia,delicious,google,yahoo etc.. This is the updated version of my previous post post on the same.. in this i have added a new stumble upon button.If you use this you will get the bookmarking icons after each blog post as you see on my blog here . To get this working on your blog do the following steps.. 

1)Goto Blogger Template>Edit HTML back up your template and expand the widget templates.. 
2)Now in your template find 

</head>
and just above that paste the following code 
<script src='http://blogger-plugins.googlecode.com/files/bkmrk_hover.js'></script> 
<style type='text/css'> .bookmark img { border: 0; padding:0px; } .bookmark a:hover { position: relative; top: 1px; left: 1px; } </style>

3)Now find 
<p class='post-footer-line post-footer-line-3'>

Or if that is not there then find 
<div class='post-footer-line post-footer-line-3'>

and place the  following code  just below any of these lines[whichever is present in your template].
<!-- Social Bookmarking Icons Start  www.bloggerplugins.org-->
<span class='bookmark'><table align='left' border='0' cellpadding='0' width='100%'><tr><td style='vertical-align:middle' valign='middle' width='30%'><div expr:id='&quot;sbtxt&quot;+data:post.id'>Bookmark this post:</div><script type='text/javascript'>showsbtext(&quot;sbtxt&quot; + &quot;<data:post.id/>&quot;,0)</script></td><td><a expr:href='&quot;http://www.stumbleupon.com/submit?url=&quot; + data:post.canonicalUrl + &quot;&amp;title=&quot; + data:post.title' expr:onmouseout='&quot;javascript:showsbtext(\&quot;sbtxt&quot; + data:post.id + &quot;\&quot;,0);&quot;' expr:onmouseover='&quot;javascript:showsbtext(\&quot;sbtxt&quot; + data:post.id + &quot;\&quot;,19);&quot;' rel='nofollow' target='_blank'><img alt='StumpleUpon' src='http://lh4.ggpht.com/_u4gySN2ZgqE/SnVFoJLmchI/AAAAAAAAAjg/-2mcU8UjohA/icon_sb_stumb.gif%5B4%5D.png?imgmax=800'/></a> <a expr:href='&quot;http://digg.com/submit?phase=3&amp;url=&quot; + data:post.canonicalUrl' expr:onmouseout='&quot;javascript:showsbtext(\&quot;sbtxt&quot; + data:post.id + &quot;\&quot;,0);&quot;' expr:onmouseover='&quot;javascript:showsbtext(\&quot;sbtxt&quot; + data:post.id + &quot;\&quot;,1);&quot;' rel='nofollow' target='_blank'><img alt='DiggIt!' src='http://lh5.ggpht.com/_u4gySN2ZgqE/SnVFiI7X5sI/AAAAAAAAAjE/uoviRb4H0V8/icon_sb_dig%5B4%5D.gif?imgmax=800'/></a> <a expr:href='&quot;http://del.icio.us/post?url=&quot; + data:post.canonicalUrl + &quot;&amp;title=&quot; + data:post.title' expr:onmouseout='&quot;javascript:showsbtext(\&quot;sbtxt&quot; + data:post.id + &quot;\&quot;,0);&quot;' expr:onmouseover='&quot;javascript:showsbtext(\&quot;sbtxt&quot; + data:post.id + &quot;\&quot;,2);&quot;' rel='nofollow' target='_blank'><img alt='Del.icio.us' src='http://lh4.ggpht.com/_u4gySN2ZgqE/SnVFhIJeylI/AAAAAAAAAjA/efK7u8suKvs/icon_sb_del%5B4%5D.gif?imgmax=800'/></a> <a expr:href='&quot;http://www.blinklist.com/index.php?Action=Blink/addblink.php&amp;Description=&amp;Url=&quot; + data:post.canonicalUrl + &quot;&amp;Title=&quot; + data:post.title' expr:onmouseout='&quot;javascript:showsbtext(\&quot;sbtxt&quot; + data:post.id + &quot;\&quot;,0);&quot;' expr:onmouseover='&quot;javascript:showsbtext(\&quot;sbtxt&quot; + data:post.id + &quot;\&quot;,3);&quot;' rel='nofollow' target='_blank'><img alt='Blinklist' src='http://lh5.ggpht.com/_u4gySN2ZgqE/SnVFgIXzFNI/AAAAAAAAAi8/Vgqkftp6mvk/icon_sb_bli%5B4%5D.gif?imgmax=800'/></a> <a expr:href='&quot;http://myweb2.search.yahoo.com/myresults/bookmarklet?u=&quot; + data:post.canonicalUrl + &quot;&amp;=&quot; + data:post.title' expr:onmouseout='&quot;javascript:showsbtext(\&quot;sbtxt&quot; + data:post.id + &quot;\&quot;,0);&quot;' expr:onmouseover='&quot;javascript:showsbtext(\&quot;sbtxt&quot; + data:post.id + &quot;\&quot;,4);&quot;' rel='nofollow' target='_blank'><img alt='Yahoo' src='http://lh3.ggpht.com/_u4gySN2ZgqE/SnVFqxs6oCI/AAAAAAAAAjs/s3Gqfd7n0KQ/icon_sb_yah%5B4%5D.gif?imgmax=800'/></a> <a expr:href='&quot;http://www.furl.net/storeIt.jsp?u=&quot; + data:post.canonicalUrl + &quot;&amp;t=&quot; + data:post.title' expr:onmouseout='&quot;javascript:showsbtext(\&quot;sbtxt&quot; + data:post.id + &quot;\&quot;,0);&quot;' expr:onmouseover='&quot;javascript:showsbtext(\&quot;sbtxt&quot; + data:post.id + &quot;\&quot;,8);&quot;' rel='nofollow' target='_blank'><img alt='Furl' src='http://lh6.ggpht.com/_u4gySN2ZgqE/SnVFiyVxsBI/AAAAAAAAAjI/Zwu2964qKmg/icon_sb_fur%5B4%5D.gif?imgmax=800'/></a> <a expr:href='&quot;http://www.technorati.com/cosmos/search.html?url=&quot; + data:post.canonicalUrl' expr:onmouseout='&quot;javascript:showsbtext(\&quot;sbtxt&quot; + data:post.id + &quot;\&quot;,0);&quot;' expr:onmouseover='&quot;javascript:showsbtext(\&quot;sbtxt&quot; + data:post.id + &quot;\&quot;,9);&quot;' rel='nofollow' target='_blank'><img alt='Technorati' src='http://lh3.ggpht.com/_u4gySN2ZgqE/SnVFpG5R_SI/AAAAAAAAAjk/-cFqb1ngIIA/icon_sb_tec%5B4%5D.gif?imgmax=800'/></a> <a expr:href='&quot;http://www.simpy.com/simpy/LinkAdd.do?href=&quot; + data:post.canonicalUrl + &quot;&amp;title=&quot; + data:post.title' expr:onmouseout='&quot;javascript:showsbtext(\&quot;sbtxt&quot; + data:post.id + &quot;\&quot;,0);&quot;' expr:onmouseover='&quot;javascript:showsbtext(\&quot;sbtxt&quot; + data:post.id + &quot;\&quot;,10);&quot;' rel='nofollow' target='_blank'><img alt='Simpy' src='http://lh6.ggpht.com/_u4gySN2ZgqE/SnVFmiSmYfI/AAAAAAAAAjY/oy9Mov0ttUA/icon_sb_sim%5B4%5D.gif?imgmax=800'/></a> <a expr:href='&quot;http://www.spurl.net/spurl.php?url=&quot; + data:post.canonicalUrl + &quot;&amp;title=&quot; +  data:post.title' expr:onmouseout='&quot;javascript:showsbtext(\&quot;sbtxt&quot; + data:post.id + &quot;\&quot;,0);&quot;' expr:onmouseover='&quot;javascript:showsbtext(\&quot;sbtxt&quot; + data:post.id + &quot;\&quot;,11);&quot;' rel='nofollow' target='_blank'><img alt='Spurl' src='http://lh6.ggpht.com/_u4gySN2ZgqE/SnVFnSDDHYI/AAAAAAAAAjc/rreFKKk8y84/icon_sb_spu%5B4%5D.gif?imgmax=800'/></a> <a expr:href='&quot;http://reddit.com/submit?url=&quot; + data:post.canonicalUrl + &quot;&amp;title=&quot; + data:post.title' expr:onmouseout='&quot;javascript:showsbtext(\&quot;sbtxt&quot; + data:post.id + &quot;\&quot;,0);&quot;' expr:onmouseover='&quot;javascript:showsbtext(\&quot;sbtxt&quot; + data:post.id + &quot;\&quot;,17);&quot;' rel='nofollow' target='_blank'><img alt='Reddit' src='http://lh4.ggpht.com/_u4gySN2ZgqE/SnVFlgfMydI/AAAAAAAAAjU/s6JQW7sjXGQ/icon_sb_red%5B4%5D.gif?imgmax=800'/></a> <a expr:href='&quot;http://www.google.com/bookmarks/mark?op=add&amp;bkmk=&quot; + data:post.canonicalUrl +  &quot;&amp;title=&quot;+data:post.title' expr:onmouseout='&quot;javascript:showsbtext(\&quot;sbtxt&quot; + data:post.id + &quot;\&quot;,0);&quot;' expr:onmouseover='&quot;javascript:showsbtext(\&quot;sbtxt&quot; + data:post.id + &quot;\&quot;,20);&quot;' rel='nofollow' target='_blank'><img alt='Google' src='http://lh4.ggpht.com/_u4gySN2ZgqE/SnVFj9KzF0I/AAAAAAAAAjM/JuLU-525wD8/icon_sb_goo%5B4%5D.gif?imgmax=800'/></a>
<script charset='utf-8' src='http://bit.ly/javascript-api.js?version=latest&amp;login=tweettrackjs&amp;apiKey=R_7e9987b2fd13d7e4e881f9cbb168f523' type='text/javascript'/>
 <a expr:href='&quot;http://api.tweetmeme.com/share?url=&quot;+data:post.canonicalUrl'  expr:onmouseout='&quot;javascript:showsbtext(\&quot;sbtxt&quot; + data:post.id + &quot;\&quot;,0);&quot;' expr:onmouseover='&quot;javascript:showsbtext(\&quot;sbtxt&quot; + data:post.id + &quot;\&quot;,21);&quot;' rel='nofollow' target='_blank'><img alt='Twitter' src='http://lh5.ggpht.com/_u4gySN2ZgqE/SnVFp0q8DWI/AAAAAAAAAjo/ZajyLZ5HqSY/icon_sb_twitter%5B4%5D.png?imgmax=800'/></a> <a expr:href='&quot;http://www.facebook.com/sharer.php?u=&quot; + data:post.canonicalUrl' expr:onmouseout='&quot;javascript:showsbtext(\&quot;sbtxt&quot; + data:post.id + &quot;\&quot;,0);&quot;' expr:onmouseover='&quot;javascript:showsbtext(\&quot;sbtxt&quot; + data:post.id + &quot;\&quot;,22);&quot;' rel='nofollow' target='_blank'><img alt='FaceBook' src='http://3.bp.blogspot.com/_u4gySN2ZgqE/Snq8BsUw8pI/AAAAAAAAAnM/T1ggoBrv6tk/s400/fbicon.png'/></a>
</td>
</tr>
</table><br/>
</span>
<!-- Social Bookmarking Icons End  www.bloggerplugins.org-->


if every thing went correctly you should get the bookmarking set on your blog.. and also some mouse over animation as you see on the icons below this post.. Now you can remove the unwanted buttons by removing the corresponding <a expr:href=....</a> tag. 
You can also change the button images if you like.I am looking for some better bookmarking icons(especially for that stumbleUpon).If anybody has it please leave a comment here. 
Credits to Beautiful Beta for this awesome JavaScript


Related Posts Widget for Blogger with Thumbnails

Related Posts Widget for Blogger with Thumbnails

Related Posts with Thumbnails for Blogger

related posts with thumbnails for blogger
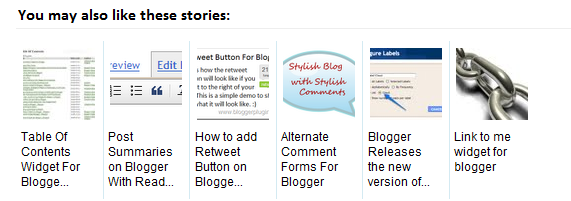
Displaying the links to related posts along with a thumbnail of the corresponding post will help you increase the page views/user .Users will be tempted to go for the related posts when they are presented attractively with thumbnails.
This is another first release from me.This one also uses the media thumbnails generated by blogger for each post.
For displaying the thumbnails,this widget will use the images uploaded for the post using the blogger image uploader(from the post editor) [Update - Now supports external images also.]

Related Posts Widget with Thumbnails for Blogger

Here are the detailed steps to install the related posts widget for blogger with thumbnails
1.First of all Login to your blogger dashboard and navigate to Layout > Edit HTML and check the "Expand Widget Templates" check box
2.Now look for
</head>
and replace it with
<!--Related Posts with thumbnails Scripts and Styles Start-->
<!-- remove --><b:if cond='data:blog.pageType == &quot;item&quot;'>
<style type="text/css">
#related-posts {
float:center;
text-transform:none;
height:100%;
min-height:100%;
padding-top:5px;
padding-left:5px;
}

#related-posts h2{
font-size: 1.6em;
font-weight: bold;
color: black;
font-family: Georgia, &#8220;Times New Roman&#8221;, Times, serif;
margin-bottom: 0.75em;
margin-top: 0em;
padding-top: 0em;
}
#related-posts a{
color:black;
}
#related-posts a:hover{
color:black;
}

#related-posts  a:hover {
background-color:#d4eaf2;
}
</style>
<script type='text/javascript'>
var defaultnoimage="http://1.bp.blogspot.com/_u4gySN2ZgqE/SosvnavWq0I/AAAAAAAAArk/yL95WlyTqr0/s400/noimage.png";
var maxresults=5;
var splittercolor="#d4eaf2";
var relatedpoststitle="Related Posts";
</script>
<script src='http://bloggergadgets.googlecode.com/files/related_posts_with_thumbnails_min.js' type='text/javascript'/>
<!-- remove --></b:if>
<!--Related Posts with thumbnails Scripts and Styles End-->
</head>
3.Now Find
<div class='post-footer-line post-footer-line-1'>
If you cant find it then try finding this one
<p class='post-footer-line post-footer-line-1'>
Now immediately after any of these lines(whichever you could find) place this code snippet
<!-- Related Posts with Thumbnails Code Start-->
<!-- remove --><b:if cond='data:blog.pageType == &quot;item&quot;'><div id='related-posts'>
<b:loop values='data:post.labels' var='label'>
<b:if cond='data:label.isLast != &quot;true&quot;'>
</b:if>
<script expr:src='&quot;/feeds/posts/default/-/&quot; + data:label.name + &quot;?alt=json-in-script&amp;callback=related_results_labels_thumbs&amp;max-results=6&quot;' type='text/javascript'/></b:loop>
<script type='text/javascript'>
removeRelatedDuplicates_thumbs();
printRelatedLabels_thumbs(&quot;<data:post.url/>&quot;);
</script>
</div><div style='clear:both'/>
<!-- remove --></b:if> 
<b:if cond='data:blog.url == data:blog.homepageUrl'><b:if cond='data:post.isFirstPost'>
<a href='http://www.bloggerplugins.org/2009/08/related-posts-thumbnails-blogger-widget.html'><img style="border: 0" alt="Related Posts Widget For Blogger with Thumbnails" src="http://image.bloggerplugins.org/blogger-widgets.png" /></a><a href='http://bloggertemplates.bloggerplugins.org/' ><img style="border: 0" alt="Blogger Templates" src="http://image.bloggerplugins.org/blogger-templates.png" /></a>
</b:if></b:if>
<!-- Related Posts with Thumbnails Code End-->
4.You can adjust the maximum number of related posts being displayed by editing this line in the code.
var maxresults=5;
you will also have to edit the posts per label(it should ideally be one more that maxresults)
max-results=6
5.To edit the title of the widget you can change this line of code
var relatedpoststitle="Related Posts";
6.To change the default thumbnail, you can edit this line of code
var defaultnoimage="http://1.bp.blogspot.com/_u4gySN2ZgqE/SosvnavWq0I/AAAAAAAAArk/yL95WlyTqr0/s400/noimage.png";
7.To Change the Colour of the Splitter Line , edit
var splittercolor="#d4eaf2";
To change the other colours and all you will have to modify the CSS
If you fall into troubles implementing this,don't panic.. :) .just leave me a comment here and i will help you out. If you like to give me any suggestions on how to improve this widget,then it would be really great.

How to display the related posts on every page and not only on the post pages?

Just remove the two lines starting with <!-- remove --> from both step 3 and step 2.
that is lines
<!-- remove --><b:if cond='data:blog.pageType == &quot;item&quot;'>
and
<!-- remove --></b:if>
Update 29/03/2012 : If the script is not working for you then please change http://blogergadgets.googlecode.com/files/related-posts-with-thumbnails-for-blogger-pro.js to http://bloggergadgets.googlecode.com/files/related_posts_with_thumbnails_min.js
Sorry for the trouble :-)


Numbered Page Navigation For Blogger

Numbered Page Navigation For Blogger

Page Navigation is a really awesome and long awaited feature. You might have seen numbered page navigation on many wordpress blogs(wp-pagenavi by Lester Chan). Muhammad Rias of Techie Blogger had already developed a page navigation system for blogger.It really was an awesome trick which was made at a time when nobody could even think of implementing it on blogger.It had some minor bugs and now Abu Farhan has perfected it and he has now given us the perfect page navigation solution.Here is a little screenshot of what this is all about.blogger page navigation
When you use this hack,you will see this kind of navigation on your blog’s home page and label pages(needs little customization).

Implementation of Blogger Page Navigation

Those who are bad at HTML modifications can use my one click installer :)
Add Recent Posts Widget 
After installing this widget proceed to the label fix.

The Complex Method. :P

If you installed the widget you shouldn’t be here.. Scroll down to the label fix.
1.Login to Blogger Dashboard and navigate to Layout > Edit Html
2.Don’t click the checkbox which says ‘Expand Widget Templates’
3.Now find
]]></b:skin>
and replace it with
.showpageArea a {
text-decoration:underline;
}
.showpageNum a {
text-decoration:none;
border: 1px solid #cccccc;
margin:0 3px;
padding:3px;
}
.showpageNum a:hover {
border: 1px solid #cccccc;
background-color:#cccccc;
}
.showpagePoint {
color:#333;
text-decoration:none;
border: 1px solid #cccccc;
background: #cccccc;
margin:0 3px;
padding:3px;
}
.showpageOf {
text-decoration:none;
padding:3px;
margin: 0 3px 0 0;
}
.showpage a {
text-decoration:none;
border: 1px solid #cccccc;
padding:3px;
}
.showpage a:hover {
text-decoration:none;
}
.showpageNum a:link,.showpage a:link {
text-decoration:none;
color:#333333;
}
]]></b:skin>
This is the CSS part which defines the look and feel of the page navigation.You can modify it according to your need
4.Next is the JavaScript part. Find
</body>
and replace it with
<!--Page Navigation Starts-->
<b:if cond='data:blog.pageType != &quot;item&quot;'>
<b:if cond='data:blog.pageType != &quot;static_page&quot;'>
<script type='text/javascript'>
var pageCount=5;
var displayPageNum=5;
var upPageWord =&#39;Previous&#39;;
var downPageWord =&#39;Next&#39;;
</script>
<script src='http://bloggergadgets.googlecode.com/files/blogger_pagenavi_min.js' type='text/javascript'/>
</b:if>
</b:if>
<!--Page Navigation Ends -->
</body>
As you can see,there are some customizable parameters in this code
var pageCount=5;
This code determines the number of posts that would be displayed per page.
var displayPageNum=5;
This code determines the number of additional page navigation numbers that will be displayed on the page.
var upPageWord =&#39;Previous&#39;;
var downPageWord =&#39;Next&#39;;
These two lines determine the text that would be shown for the previous page and next page respectively.

Label Fix

Now we have another problem.By default,the blogger label pages will show 20 posts.We will have to cut this down to the value that we gave for the variable pageCount (or the posts per page).For this we will have to edit our template

How to Edit the template to cut short the posts per page?

Go to the Edit HTML page and expand the Widget Templates
Now find each occurrence of
'data:label.url'
(including the quotes) and replace each of it with
'data:label.url + &quot;?&amp;max-results=5&quot;'
Here 5 is the number of posts to be displayed per page.
Now if you are using the label cloud widget by phydeaux3,then find
a.href = &#39;/search/label/&#39;+encodeURIComponent(t);
and replace it with
a.href = &#39;/search/label/&#39;+encodeURIComponent(t)+&#39;?&amp;max-results=5&#39;;

Here also 5 is the number of posts to be displayed per page.
Now you should have the Blogger Page Navigation working perfectly on your blog. :)
This tutorial is based on Codes from Abu Farhan and Muhammad Rias. So if you plan to write this tutorial on your blog,do link back to them also.